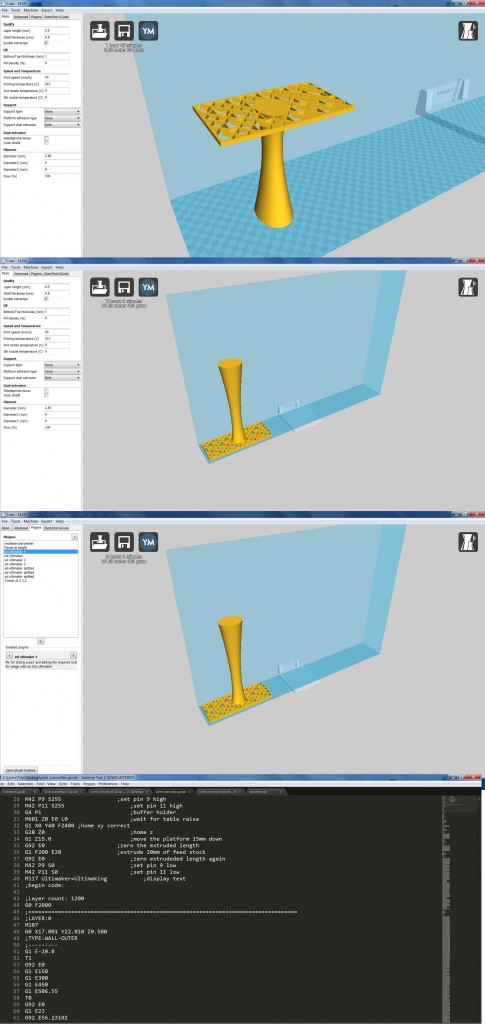
Since the project is almost over, and the ultimaker xxl is finished and (almost) fully functional, we will explain the steps required to print with this modified Ultimaker.
The first thing to do is to load the file you want to print into cura. This file does not have to be modified or split in any way, this will be done by the plugin. The only requirements the model has to be printable is that it can’t contain straight lines longer than 150 mm (however, slightly curved lines are no problem) and that the model can’t have large overhangs.
After importing the model in cura (increase printbed size if it doesn’t fit), the part can be rotated, scaled and moved. The part has to start at the left side of the printable area to reduce the required print time and reduce the risk of errors during printing.
The next step is to enable the required plugin in the plugin menu (and, if it isn’t available, to place the plugin in the plugin folder). The plugin converts the cura generated g-code to code that is able to controll both the internal and external x-axes. Make sure the plugin is displayed on the lower side of the menu.
After enabling the plugin, the g-code can be generated by clicking the save toolpath or toolpath to sd button on the top side of the screen. If you want to check that the plugin functioned correctly, it is possible to open the generated g-code in a text editor and look for lines filled with “========”. If these lines are present, the plugin functioned correctly.
The final step is to manually move the ultimaker to the left-most position on the external axis. This due to the lack of end stop for the external x-axis. After this is done, the file can be selected and the printing begins.